 Rebound
 Rebound
Restore a backup
You can restore a backup to the site it came from or to any other connected site, in full or in part. The restore is staged and checked first, and the previous state is kept so you can roll back.
Applies to: Rebound 2.0 · also from the Rebound plugin page (own backups only)
To restore a backup
- Choose Restore.
- Under What to restore, pick the site and the backup (or a database dump).
- Under Target site, choose where to restore it.
- Choose Restore, or Test restore only to prove the backup works without changing anything.
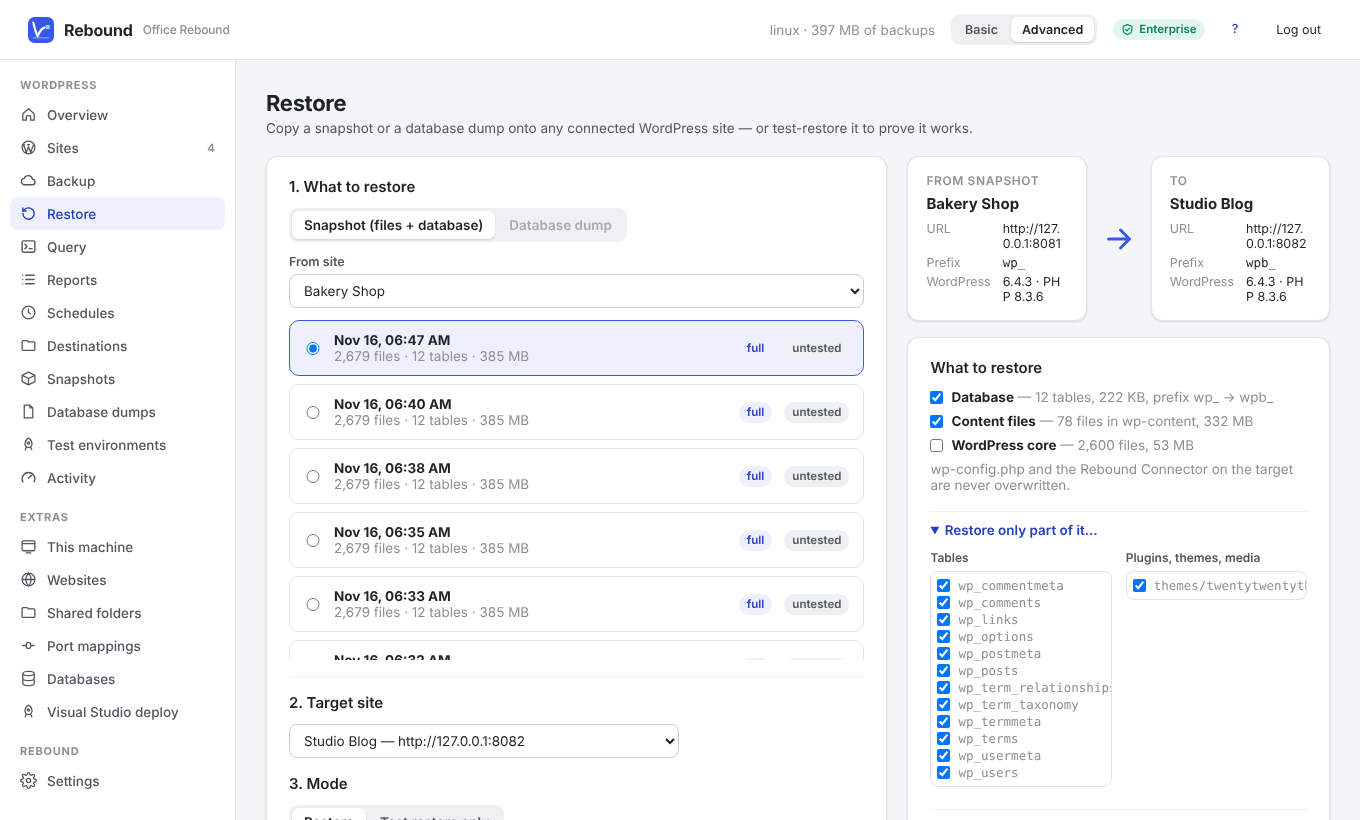
- Review the details: database, content files, WordPress core, and the search & replace pairs Rebound suggests (for example the old address → the new one).
- Tick the confirmation and click Restore.
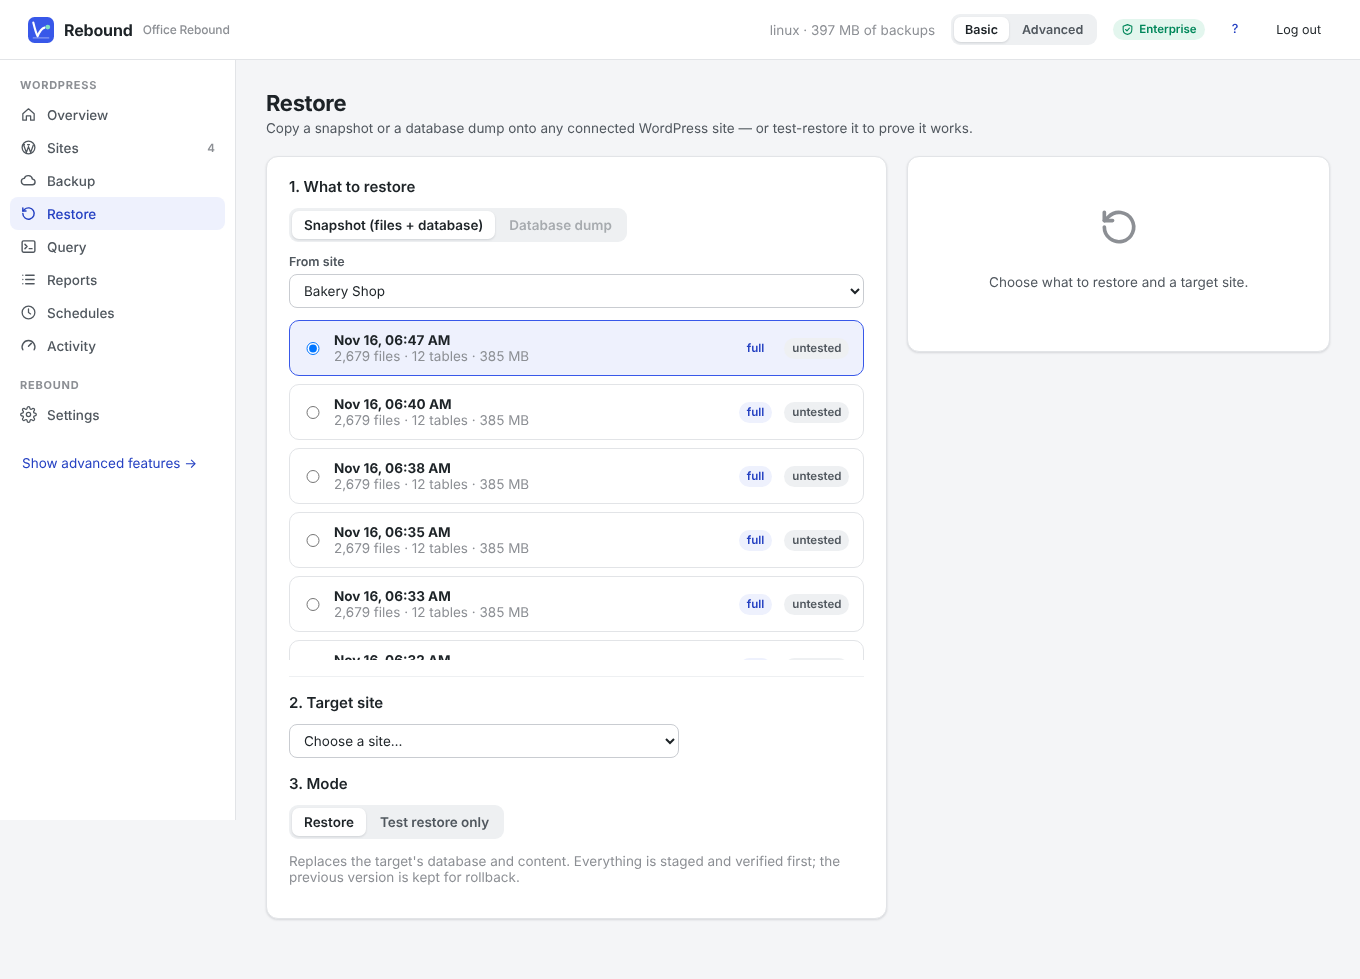
When the restore is done, click Keep it to make it permanent or Roll back to return the site to how it was.
Partial restore
In Advanced mode, open Restore only part of it… and untick what you do not want: individual tables, plugins, themes or the media library.
Other ways to restore
- Site to site in one go: choose Copy to another site… in the site's ••• menu (see Back up a site).
- Without Rebound: restore a zip file made by the plugin on Rebound → Restore in WordPress (see Zip backups without Rebound).
What Rebound takes care of
- Addresses inside the database are rewritten, including inside serialized PHP data.
- A different table prefix on the target is handled.
wp-config.phpand the Rebound plugin on the target are never overwritten.- Row counts and file checksums are verified before the site is switched over.
!
Important Restoring replaces the target's users with the users from the backup. Log in with an account from the backup afterwards.