 Rebound
 Rebound
Schedules and rolling retention
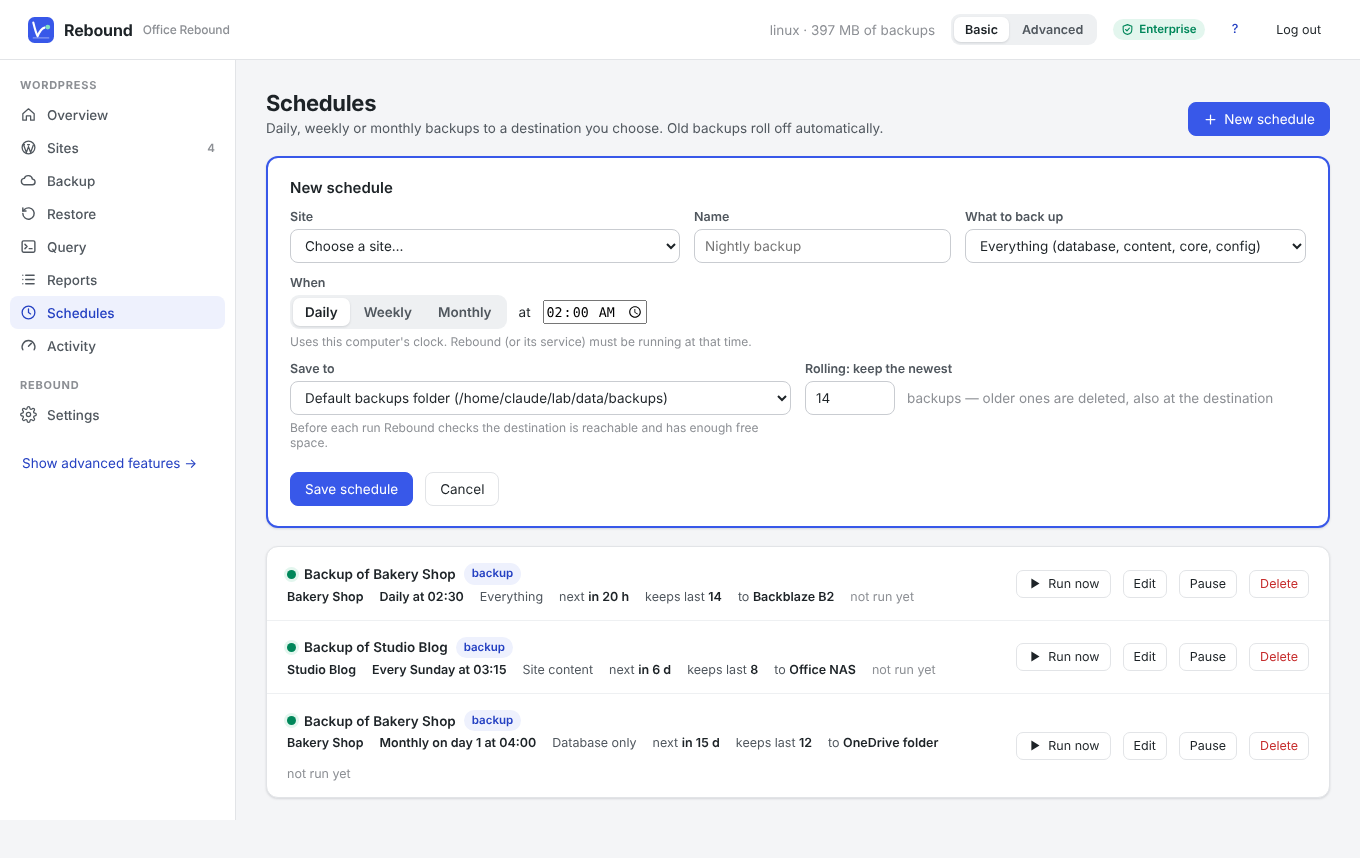
A schedule backs up a site automatically to a destination and deletes the oldest backups so the destination never fills up.
Applies to: Rebound 2.0 Pro and Enterprise · also from the Rebound plugin page
To create a schedule
- Choose Schedules → New schedule.
- Choose the site and what to back up.
- Choose when: Daily, Weekly (pick the day) or Monthly (pick the day of the month), and the time.
- Choose where to save to.
- Under Rolling, enter how many backups to keep.
- Click Save schedule.
Before every run
Rebound checks that the destination can be reached and has enough free space for the next backup (estimated from earlier runs). If not, the run is skipped and the reason is shown with the schedule — the previous backups stay untouched.
Rolling retention
After each successful backup, Rebound keeps the newest N backups of that schedule and deletes older ones — locally and at the destination. Data still used by a newer backup is kept.
Note Scheduled backups are incremental (with Pro). Times use the clock of the computer Rebound runs on, including daylight saving time. Rebound (or its service) must be running at that time; a missed run starts at the next check.
In Advanced mode a schedule can also test-restore each new backup onto a staging site to prove it can be restored.